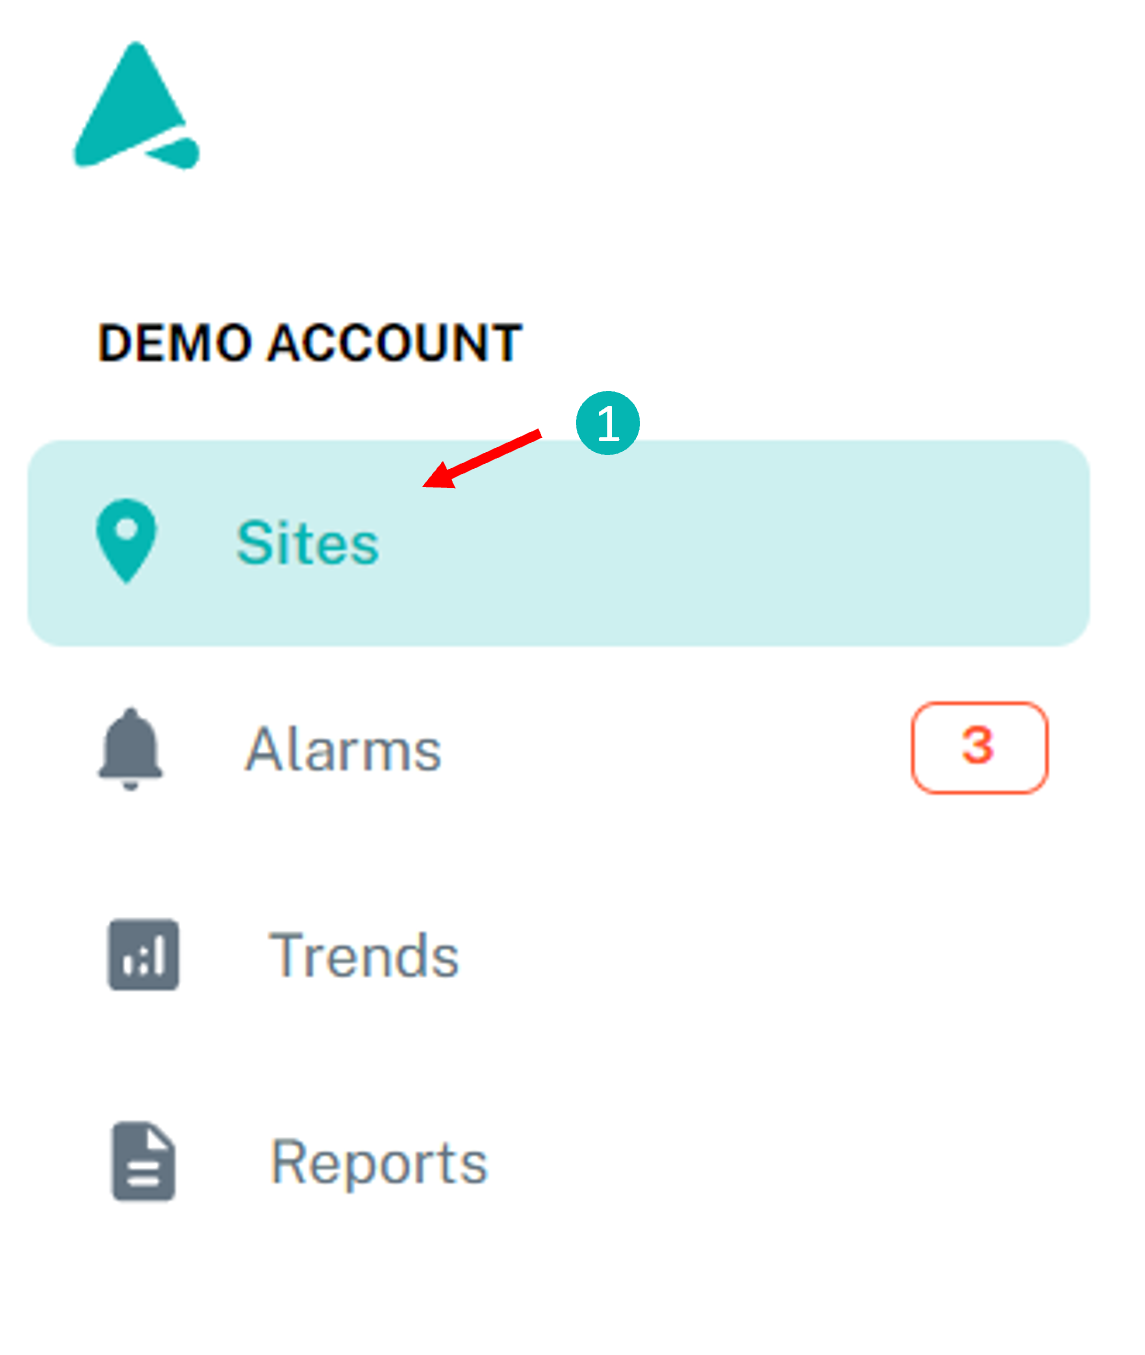
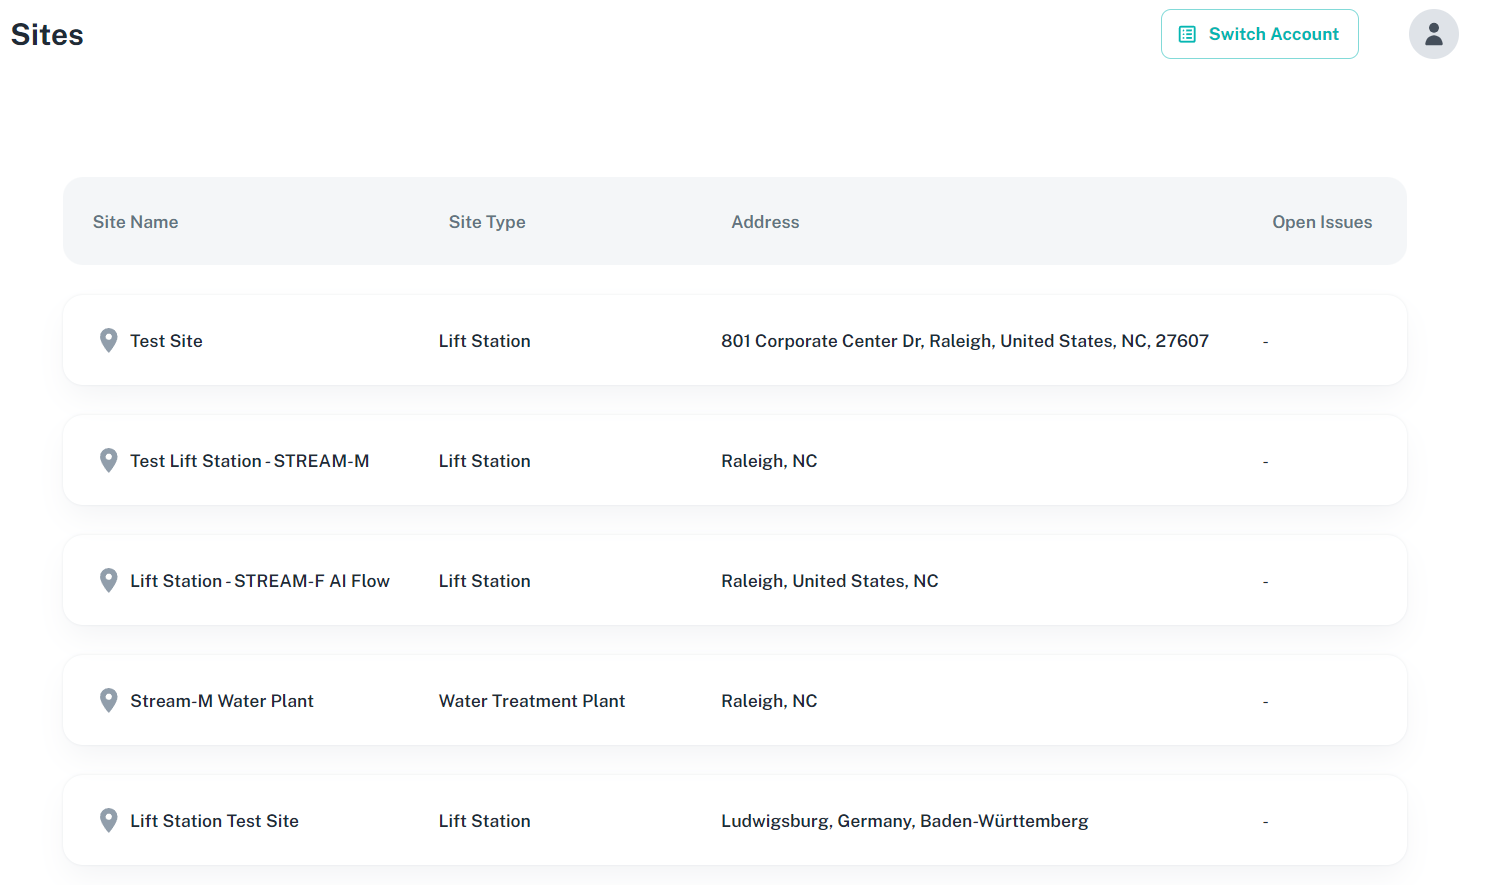
Sites Main Page #
Clicking the sites tab will open the main sites page. This page’s purpose is to list all the sites available to the current account.
Choosing a Site #
Clicking on any site will open its Site Overview page which will be described in the next section. A search box and filter are available to help users find a specific site. The add site button allows an administrator to add a new site and enter the site’s details.
Site Overview Page #
Once a site has been selected, the site overview page will open. The purpose of this page is to provide the user with an overview of a specific site based around the assets listed for that site. This site overview page is customizable using widgets. The add widget (1) and edit view (2) buttons can be used to add a new widget, and to move the widgets respectively. The sites overview page can show pump status, well level status, water tower status, and trends. Additionally, any alarms for one of these assets can be seen on the site overview page.
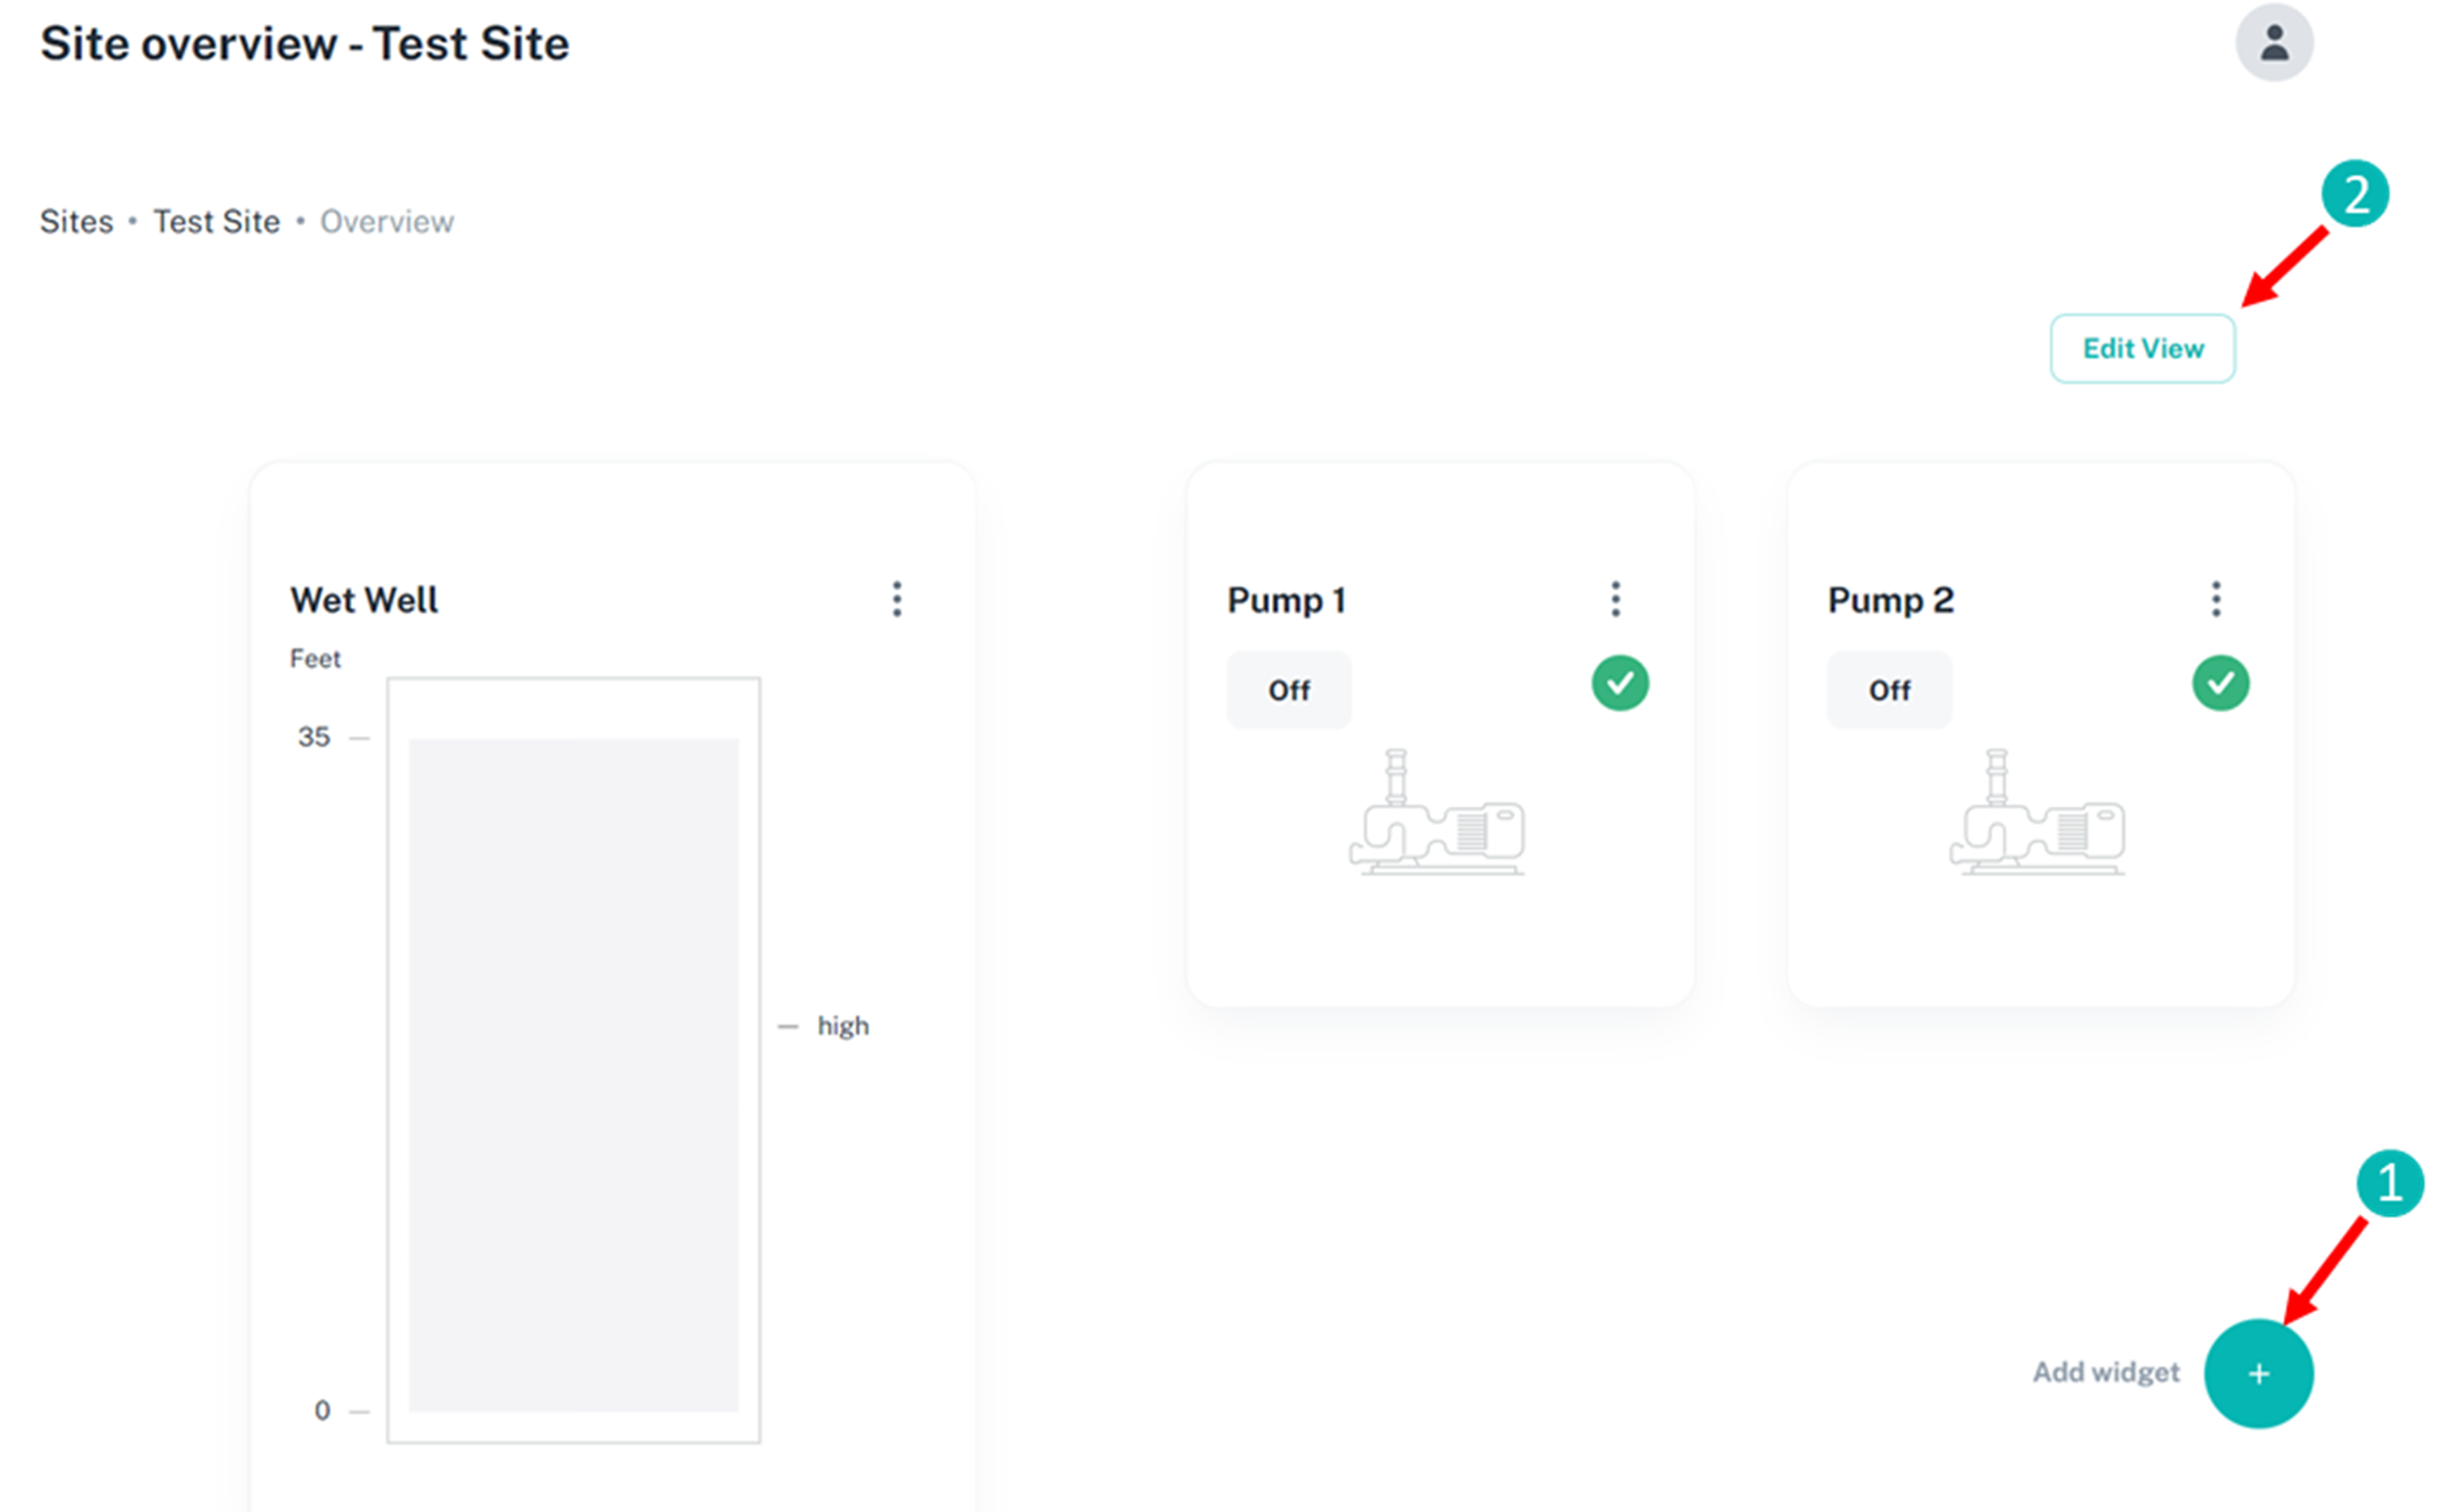
- Asset Name
- Asset Status (Differs based on asset type)
- Asset Options (Covered in next section)
- Asset Alarm Status

Adding a Widget #
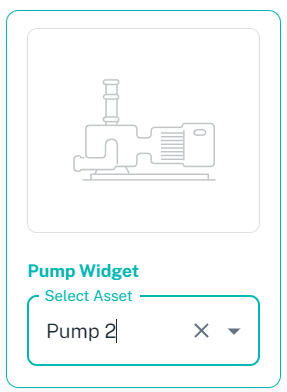
To add a widget, click the add widget button which will bring up the widget screen. In this screen, the user must select the type of widget correlating to the asset type, and the specific asset the widget should display. For example, if a user is trying to create a widget for their second pump, they would select the pump widget with “Pump 2” as the asset.
To add a trend widget, select the type of trend widget, then the specific data that should be displayed.

Modifying a Widget #
To modify a widget, click the three-dot setting button on the widget. Next select “Change Widget”. This allows the user to change the asset linked to a widget or to modify the trend data.

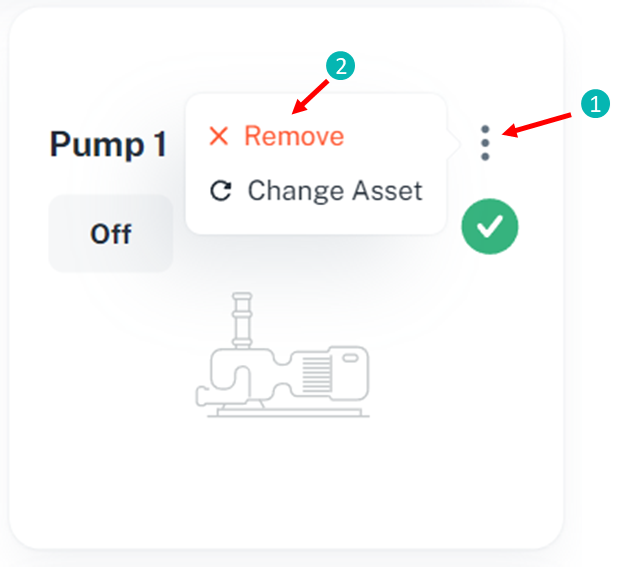
Deleting a Widget #
To remove a widget, select the three-dot settings button on a widget. Next select “Remove”.
Site Settings #
To view site settings, first choose a site from the main sites page. Once a site is chosen, the “Settings” tab and options will appear on the left side of the screen. Click on the Settings tab to reveal the five settings categories.
- Site Info: This allows the user to modify the name and location of a site
- Gateways: This setting is used to set up a connection between a site and an FX30. This setting will typically only be used by Streametric engineers during site set-up
- Data Sources: This page is used to add any additional data sources beside the site RTU’s.
- Assets: This page is used to view assets for a site and to add an asset to a site.
- Alarm Rules: This page is used to view, add, or modify alarm rules for an asset/site.
Changing a Sites Name or Location #
To change a site’s information, select the “Site Info” page under site settings. This will open the site info screen. Enter the updated information into this screen and click “Save Changes” to modify the site’s information.

Gateway Settings #
Adding or Modifying a Gateway #
Adding or modifying a gateway can be done by selecting the “Gateways” settings tab. The gateway allows for the RTU to send information to the cloud-based app. Modifying the gateway can cause the application to not function correctly. A Streametric Engineer should be consulted before changing a Gateway.
Viewing RTU Connection Status #
One useful function on the Gateways page is the connection status. In site settings, select “Gateways”. This will open a list of Gateways. The connection status of each gateway can be seen on this page. This can be useful in troubleshooting any connection issues.
Assets #
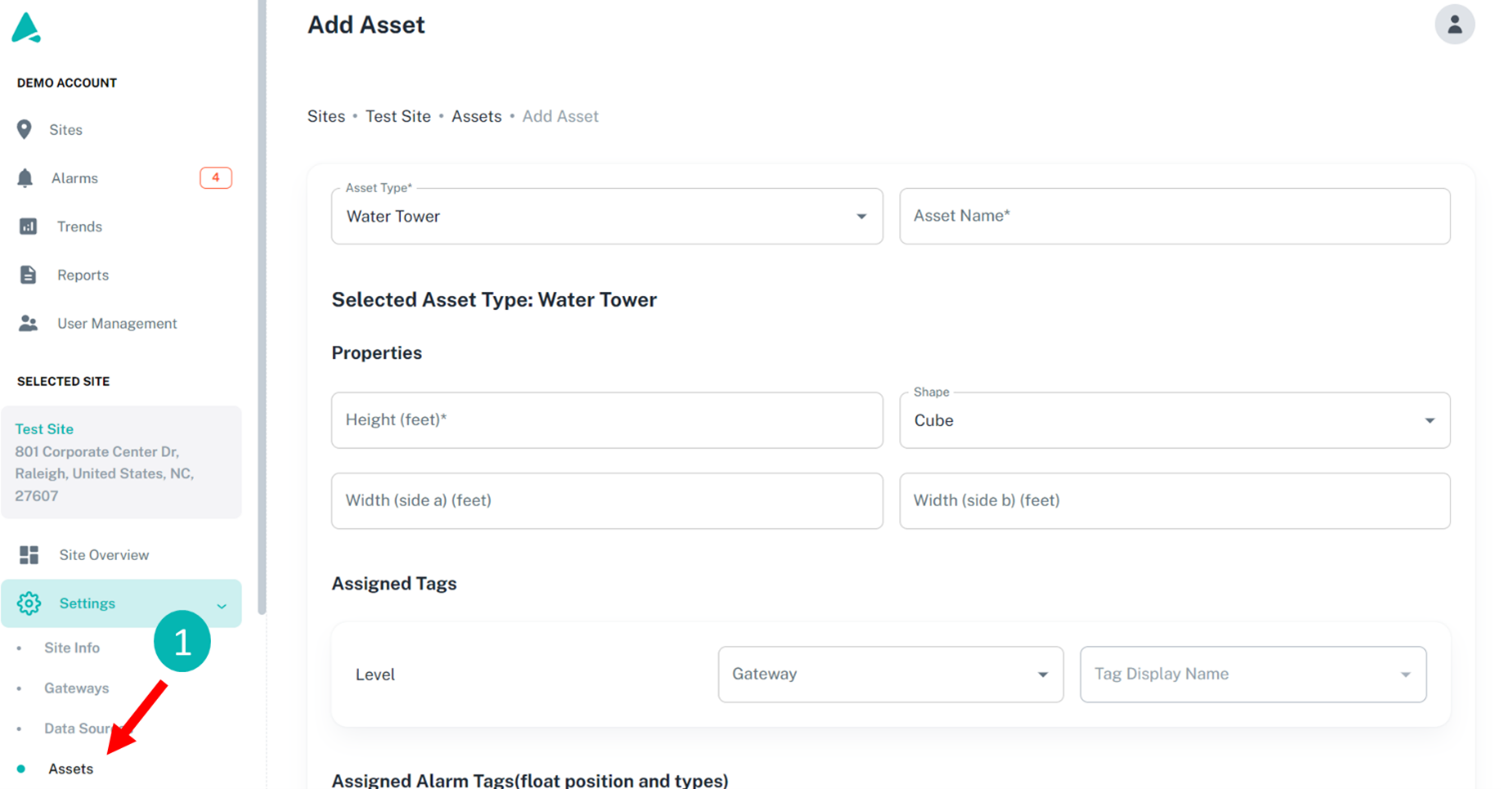
Adding an Asset #
To add an asset, first go to the “Assets” page under site setting. Next, select the “Add Asset” button. This opens an additional page. On this page, all the asset information must be entered. First, the asset type and asset name. The asset type is a drop-down list of all the available assets.
For the pump asset, the pump performance characteristics such as horsepower, frequency, etc. should be entered. Although this is not required it helps Streametric Engineers troubleshoot pump problems remotely and to assist in setting realistic alarm bounds.
For the Water Tower and Wet Well assets, the well or tower’s maximum height should be entered. Two shapes are available for the Water Tower and Wet Well. These are cylinder and cube. Select the shape that best fits the asset being modeled. Next enter either Diameter or Side lengths. For wells or towers of a more complicated shape, contact Streametric support.
The assigned Tags and Assigned alarm tags are used to connect the asset to specific trends and alarms. This will be done when the site is set up.
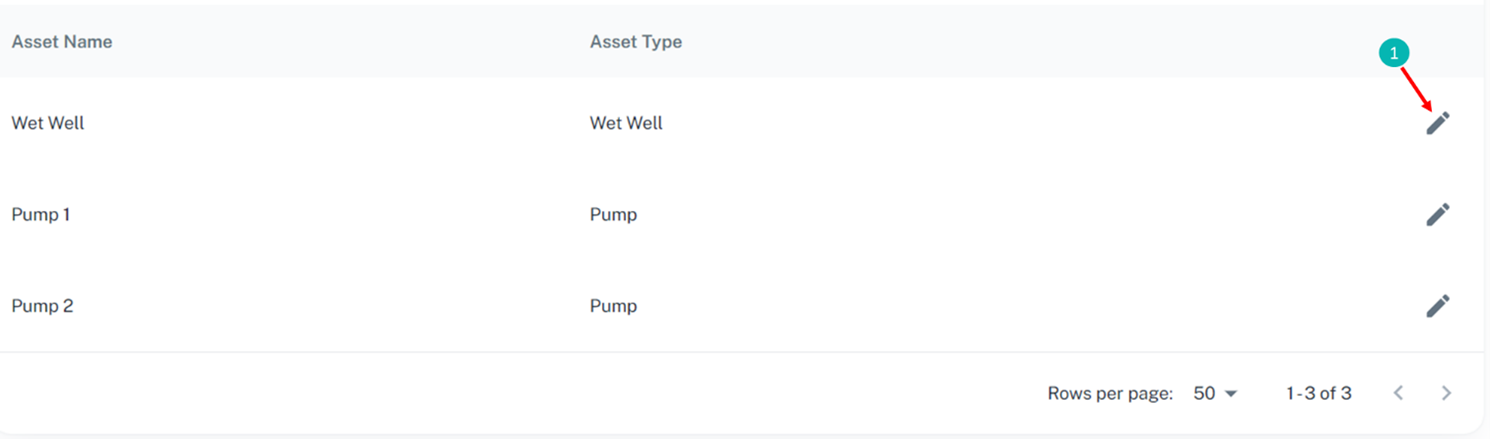
Modifying an Asset #
To modify an asset, select the edit button in the asset list next to the asset you want to edit. This opens a page that is identical to the add an asset page described above. To apply changes made, click the “Save Changes” button.
Alarm Rules #
The alarm rules settings tab allows the user to add, modify, and subscribe to alarms for a site.
Adding an Alarm #
To add an alarm, select the “Add Alarm Rule” button on the Alarm Rules page. This opens the Add Alarm Rule page. On this page, the first step is to enter the alarm name. Next, select the tag that will be used for this alarm. This tag is linked to an asset. The tag’s value will determine when an alarm is activated. Next, enter the high limit and low limits for this alarm. These limits will be the bounds for acceptable values for the tag select. Any value outside these limits will activate an alarm.
The “Additional Condition” section allows the user to add additional conditions for an alarm rule. This additional condition can check if a tag’s values are greater than, less than, or equal to a set value. For an alarm to be triggered, all additional conditions must be met. For example, the additional conditions could be set on a Pump 1 Low Current alarm so that the low current alarm only gets activated if Pump 1 is set to a Run state.
The notification delay setting allows for the user to set a period in which an alarm notification will not be sent to subscribers. This is useful to prevent many alarm notifications being sent. An example is to set a 5 second delay on Pump1 High Current so that a high current when the pump turns on only sends an alarm if the current stays above the threshold for more than 5 seconds.
The alarm priority section is used to label an alarm as critical, warning, or info based on how crucial an alarm is.
The acknowledgment requires a site technician/engineer to acknowledge an alarm for it to be cleared.

Subscribing or Unsubscribing from an Alarm #
To subscribe or unsubscribe from an alarm, go to the Alarm Rules settings under the site. Find the alarm in the list of alarms for that site. In the “Subscribed by me” column, use the drop-down box to choose whether you are subscribed and the notification method for the alarm. The options for notifications are SMS, Email, or both.


